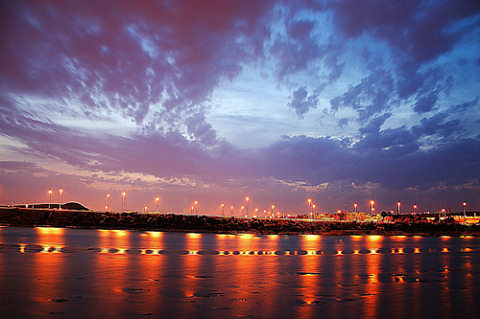
One of the areas of photography that people get wrong is night photography, most people assume that you just use the flash and everything is fine. OK, this is fine for the odd snap shot of your friends or on a night out. But, if you want to get creative and make stunning images at night you’re going to have to do a lot more than just turn the flash on, when you have finished reading this you’ll be able to create images like this:
In this article I am going to show you how to use a technique called Long Exposure. Say good bye to harsh lighting and dark backgrounds. Sort of. This article will show you how to take pictures of night scenes with no moving objects. Night photos of people I will show you later on in another article as that is another kettle of fish.
Firstly, let’s pick a subject. For this article our subject will be a lake. That is easy, it doesn’t get too much more difficult. I promise. Now you have your subject, you’ll need to get your equipment setup. For this article, I’ll use my equipment to show you what is needed.
Equipment Required
The following list links to the equipment that I recommend and use. You can buy the items from these links.
- Digital camera
- Tripod
- Remote shutter release
- Something to do while exposing your shot
Now let’s get down to business. First, set your tripod up at the desired height, to save you any trouble later on make sure your tripod is level. You will thank me. Now, mount the camera on the tripod making sure it’s secure.
Setting Up Your Shot
Switch your camera to manual. OK, you’ve got this far it’s going good, time to set up the shot. Don’t bother composing your shot just yet as we have to sort some other things out first. Set your camera to auto-focus or AF. This may not work depending on the conditions but most of the time it will work just fine. Zoom in all the way and find a light source or light area that is the same distance away as the subject you want in focus, press the shutter half way down. Once the camera has focused on the light source or light area zoom all the way out (or however far out you want when you compose the shot, you can zoom in or out as far as you like it will always stay in focus) and make sure, without touching the shutter or the focus ring switch back to manual focus. Be sure you’re not touching the focus ring when you compose.
Now you have the camera focused you can proceed to compose the shot. This is something that no tutorial can tell you how to do, this is in the eye of the photographer. Be creative and show off your creative eye.
Tip: Wide angles create a bigger impact than longer focal lengths.
Setting The Correct Exposure
You’re almost there, the next major part is getting the exposure right, this is easy if you know how. The best way to expose your shot manually is to use your camera’s built in light meter as a rough guide, but not as a precise judge. When you first start you will need to follow it tightly but as you gain more and more experience you won’t need the meter at all.
Change the camera to AV mode(Aperture priority) Now, set the ISO to 1600. As a rough guide I recommend you stop down the aperture to f/8 to achieve maximum sharpness when using the Canon 18-55mm kit lens but you may need to keep it at f/3.5 depending on the conditions. Now, press the shutter half way and you will see the light meter, it’s a line with a small arrow, this will move around as you change the aperture. Adjust aperture accordingly so it makes the line stay in the middle. Once it is in the middle, press the shutter down half way. The camera will give you the shutter speed that you require, make sure you remember this number as you will need it to work out how long your final exposure will be.
For this next part you may need a calculator, depending on how good your mental arithmetic is. In my case I usually need to use the calculator on my phone, maths is not a strong point for me. Now we need to calculate how long we need to keep the shutter open for. As an example we will say the camera gave you a shutter speed of 10 seconds when we used the light meter, keep this number in your head. Now set the ISO to 100. Take your number (In this example 10 seconds) and multiply that number by 16. This gives us 160 seconds, Divide this by 60, this gives us about 3 minutes.
Now plug in your remote shutter release, set the camera to BULB mode (move the shutter down past 30 seconds). Get a timing device (Phone, stop watch or similar) and get it prepared to begin. Press the remote shutter release and lock it on. Start the timer.
If you want to be certain of good exposure then you can round it up to the nearest minute (In our case 3 minutes). Once you have reached the target time, unlock the remote shutter release and wait for the camera to proceed with noise reduction.
The end result will be a nicely exposed picture.
No comments:
Post a Comment